SAFE BEAD MOUNTING
I run and hide when I hear someone is going to explode gasoline or ether to mount a tire!
When I hear of guys popping tire beads onto a rim by exploding gasoline or ether, I run! This is dangerous and unnecessary! Exploding a perfect gasoline/air mixture in a little (by most hard core guys standards) 31×10.5 tire is far more powerful than you and I can imagine! That tire is about seven to eight gallons of volume or about 28 liters, call it 25 liters. That’s like five, 5-liter engines. At 400 horsepower per 5-liters, that totals 2,000 horsepower going bang all at once! For me, tires and rims are not strong enough to withstand 2,000 horsepower, period! Does anybody out there know how to convert seven or eight gallons of perfectly mixed gasoline and air to the equivalent explosive force of sticks of dynamite? The only thing that saves explorder’s reckless behinds is that the mixture is not a perfect 15:1 combination. Typically, it is very, very rich – too much gasoline. Fact: Rich mixtures burn slower than perfect mixtures. Slower means less explosive force. Regardless, I want to totally discourage all “explosive” tire mounting methods.
And FYI, I have yet to be successful using the ratchet strap-around-the-tire technique to mount tire beads. Here’s how I safely mount a tire with literally any air compressor or air source plus a favorite rock or two.
Tubeless tires present an apparent reinflation problem with popped beads. It appears difficult to reseat the bead, but professionals make it look easy. That’s because they use high volume air compressors and special “air showers” to pop the beads onto the rim. The big compressors can get ahead of temporary bead leaks. The air showers blow air the leaking air with 360 degrees of air jets. This leads us to believe, that lacking these tools, it can’t be done, but nothing is further from the truth. The trick is to take advantage of Mother Nature’s gravity and some rim construction features.
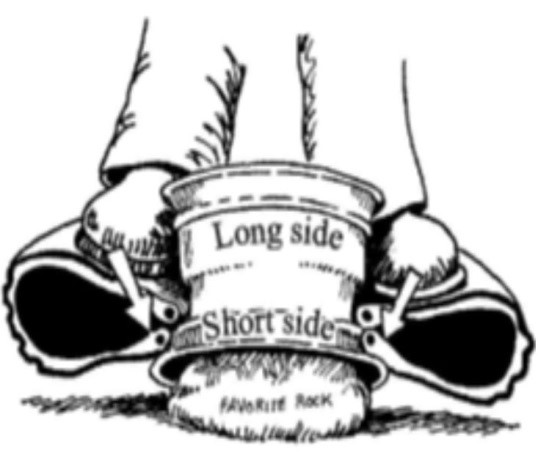
I’ll start with a tire that has both (unmounted) beads on the rim. The first objective is to get the outside bead somewhat “stuck” to the outside of the rim. You do this by supporting the upside down wheel on a rock or anything that achieves what you see. That elevates the dirt-side of the tire off of the ground by a couple of inches. You now seat the “short side” bead as best you can by stomping entirely around the tire, forcing the outside bead onto the outside part of the rim as much as possible. The “elevator” rock makes this possible by allowing the tire to “stomp” past the rim. The bigger the stomper, the tighter the hold is for the next step.
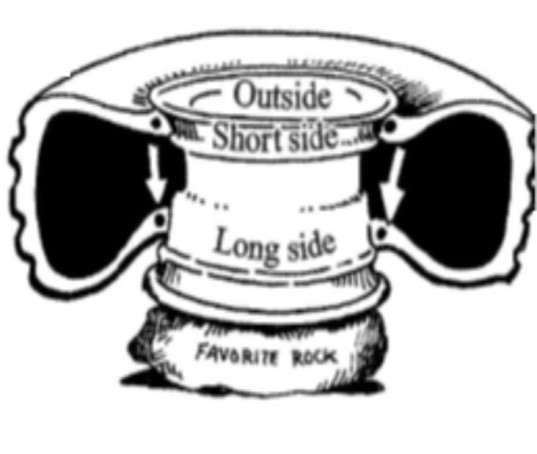
Now, only handling the rim, carefully flip the rim-tire assembly 180°. Maintain full bead-rim contact and, place the rim’s outside, up on a rock. This allows gravity to pull the inside bead down and onto the “long side” of the rim (see arrows). The reason it has to be done this way is that there is a longer, gentle sealing approach to the rim’s inside bead bump than the other way around.
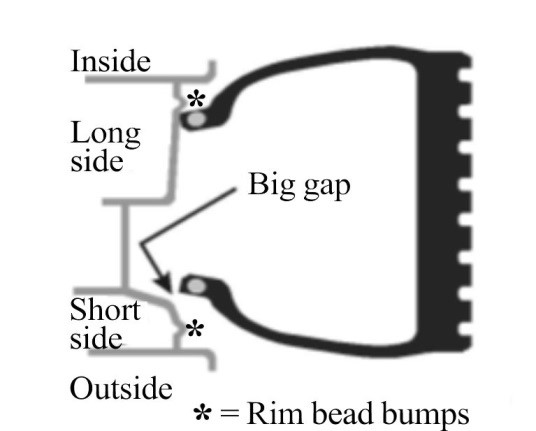
This shows what happens when you do it backwards meaning stomp the tire bead on the long side. There is a giant air-leaking gap between the tire and the short side and drop center of the rim.
As you start to inflate the tire to pop the beads on, you may have to gently “adjust” the tire position to stop any leaks you hear or feel. Simultaneously, you must avoid dislodging your stomping accomplishments. Have I been “bead popping” successful on the first try every time? No. but with patience and persistence I’ve been successful every time regardless of the compressor. Be sure to listen and/or inspect for the characteristic bead bump “pop”, and keep your fingers out of the gap! It’s bone-crushing powerful! The tire should now be tight and flush to the rim, 360° around, on both the inside and the outside.
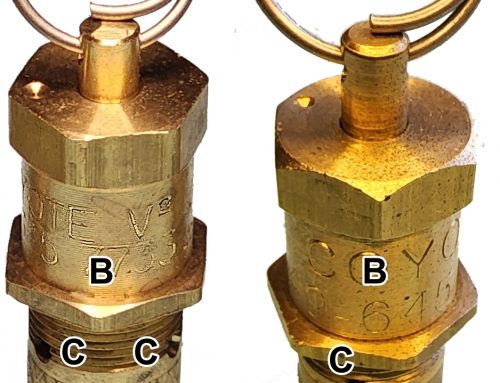
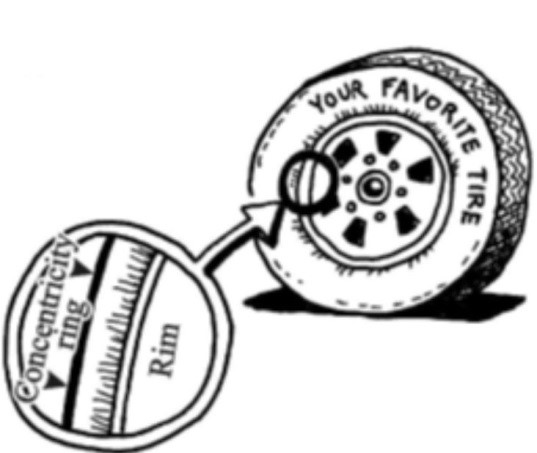
After the beads are seated, you should check what I call the tire’s concentricity mounting ring. This is the ring that is cast into the rubber just outside the bead. It shows if the tire is concentrically mounted on the rim. Concentricity means a smooth ride. Finally, adjust to your desired pressure.
Many times, with only one bead off the rim and the other securely on, it has been possible to reseat the “off” bead without even taking the tire off the vehicle. It just takes a little patient and gentle position adjustment as above. I’ve been successful virtually 100% of the time.
When you fail, add more patience. Completely dismount the tire and put bead-stretching spacers between the beads and let it set in the sun. No sun? Put it in front of the exhaust, but do NOT asphyxiate yourself! Your objective is let it warm until it permanently increases the bead-to-bead space. This helps gravity position the inside bead on that side’s gentle seating slope.
 Way back in my high school days, I worked at a service station when they still provided service. This was pre tire machine times and the rim “Safety Bead”, as Chrysler first called it, although introduced in 1940, but was still only in use by Chrysler. When faced with one of these nightmares, I’d use the lube lift on the down stroke to pop the tire beads off the rims. Then it was tire spoons and hammer time to remount it. The part that relates to this Trail Tip is pre stretching the tire beads.
At the time, new tires came tightly wrapped with a tape-like material that forced the beads to touch each other. Nice looking presentation, but it was a tubeless tire mounting nightmare! I’d throw an extra hour in my new tire installation completion time estimate to accommodate this. Oil cans were just about the right height for bead stretching. I’d grab 20 cans of oil, move the unwrapped tires out in the sun and insert the cans between the beads. And hour later, I’d go about mounting the tires. Story over.
Be safe and learn this method by practicing at home.
Thank you Harry Martin, my “Shifting Into 4WD” artist for the great graphics. The two engineer-looking ones are mine.